Publishing Your First App
Publishing Your First App
This guide walks you through publishing your first game end-to-end: creating an Application, uploading a build, publishing it, and sharing the launcher with players. Before you start, make sure you’ve created a PatchKit account and understand the core concepts (Application, Version, Channel, Launcher).
Supported platforms
PatchKit supports these application platforms:
- Windows 64 bit
- OSX 64 bit
- OSX Silicon
- Linux 64 bit
Ensure that your application is compatible with one of these platforms before proceeding.
Creating a New PatchKit Application
Navigate to the Applications page and click on the New Application button. You may be prompted to select the application type; if so, choose New Game.
On the next screen, provide the application Name and select the Platform.
You cannot change the platform of an existing application. However, you can create multiple applications for different platforms.
Finally, click on the Create button, and you will be directed to the application’s overview page.
Preparing your ZIP archive
Your build ships to PatchKit as a single ZIP archive. Get the structure right before you upload — most first-publish failures are ZIP-structure problems, and fixing them after upload means re-uploading the whole archive.
Windows / Linux
- Place the executable file at the top level of your ZIP archive.
- Ensure there is only one executable file at the top level.
- Use only alphanumeric characters in your file names (non-ASCII or
\characters will cause processing to fail — see Troubleshooting).
Mac OSX
- Place the
.appdirectory at the top level of your ZIP archive. - Ensure there is only one
.appdirectory at the top level.
ZIP compression: The archive must use STORE or DEFLATE compression. DEFLATE64 is not supported.
Example 1 — Correct Structure
Two executables are present, but only one is at the top-level position (PatchKit treats that one as the game’s main executable):
/game.exe
/data.dat
/tools/editor.exe
Example 2 — Correct Structure
Valid example for a macOS application:
/Game.app
/Game.app/Contents/MacOS/Game
/Game.app/Contents/Resources/data.dat
Example 3 — Incorrect Structure
The executable file is not at the top-level position:
/subfolder/game.exe
/subfolder/data.dat
Creating a New Version
Click on the New Version button to create a new draft version. Versions remain invisible to users until they are published.
On the version screen, click the edit icon next to the Label field and set it, for example, to 1.0. Then, click the Save button.
Click on the Import Content button to proceed to the version upload form.
Uploading Version Files
Select the ZIP file you prepared above in the upload version form. The upload stage will start automatically, followed by processing. Your web browser will refresh automatically when the processing is finished, taking you back to the version page.
You may encounter processing warnings or errors. Read through them and address any issues before publishing. If a specific error comes up, see Version Processing Errors for what it means and how to fix it.
Publishing
Once the version has been successfully processed, you can publish it using the Publish Now button.
We highly recommend reviewing the version details, including the chosen executable file, launch arguments, and the list of files.
Ensure that you want to publish a version, as once published, it cannot be taken down. Reverting requires re-uploading the previous version or linking back to the previous one if you’re using Channels.
Publishing may take a few seconds to several minutes. During this period (but not always!), you can cancel the process using the Cancel Publishing button.
Sharing the Launcher
The default launcher is the most basic version offered by PatchKit. To learn about all available options, see the Launchers section.
After publishing your first version, you can share your launcher with users in two ways:
- Download the launcher and send the files directly to users.
- Share the Share Link with users.
You can do both by navigating to your application page and clicking the Get Launcher button.
What’s Next?
Now that your first version is live, here’s what most publishers do next:
- Pick a launcher variant — the Basic launcher is fine for testing, but the Visual Editor Launcher or SDK Launcher give you proper branding and a much better player experience.
- Set up Channels — create a
betachannel to ship test builds to a subset of players without disturbing your live release. - Invite collaborators — bring your team in with role-based access (Publisher, App Limited, Developer).
- Gate access with License Keys — issue keys for closed beta, early access, or paid distribution.
- Sign your launcher — eliminate the Windows SmartScreen warning before you ship at scale (covered below).
- Automate uploads via CI — once the manual flow works, switch to
pktfor automated publishes.
Signing Certificates
When running the PatchKit Launcher on a Windows PC, you may encounter a warning from Microsoft Defender SmartScreen:
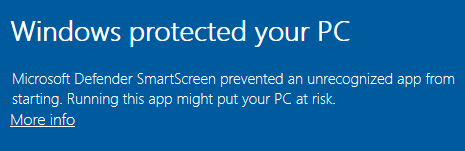
This message indicates that Microsoft Defender SmartScreen does not recognize the application and is preventing it from running. While it can be ignored by clicking the More info link and then the Run anyway button, this may lead to confusion and support requests from users.
Preventing the Warning with a Code Signing Certificate
To prevent the Windows SmartScreen warning, sign the Launcher with a code signing certificate. This increases the application’s trust score and often eliminates the warning message.
Why are our launchers unsigned? We do not sign launchers by default because it would require us to review the projects distributed by our users, creating significant overhead and slowing down the distribution process. We leave the decision of signing the launchers to the developers.
Obtaining a Code Signing Certificate
To sign the Launcher, purchase a code signing certificate from a provider. A list of providers can be found on the Microsoft Documentation Page.
Two types of certificates are available:
- Standard Validation (SV)
- Extended Validation (EV)
The main difference between these certificates is the level of validation. While an SV certificate should eliminate the Windows SmartScreen warning message, an EV certificate will increase the trust score even further. However, we cannot guarantee the warning will not appear even with an SV certificate.
Signing the Binaries
For a Unity-based single-launcher setup, you will need to sign only the Launcher.exe file. If you’re building it within a setup wizard, you will also need to sign the setup wizard executable.
The code signing process is detailed in the Comodo Code Signing guide. Review it carefully.
Code Signing on macOS
The issue of unsigned applications on OS X is similar to that on Windows, but starting such an application may be more difficult. For more information, see Open a Mac app from an unidentified developer.
Signing an application on OS X is easier than on Windows and only requires a Developer ID. For more information, see Signing an application on OS X.